

2.6.3 IoT Sensor for Camera
Installation of the IoT Sensor for Camera
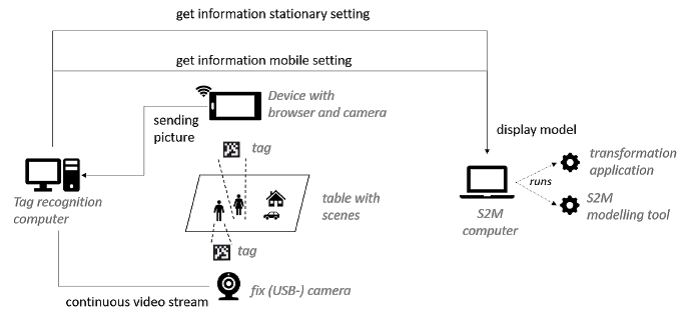
1. Camera Setup
There are two possible ways to capture the scene canvas on which a storytelling-based design thinking method can be performed. The standard is the use of a USB camera that continuously streams the scene to the tag recognition computer. An alternative is to take a picture of the scene table and send the picture to the tag recognition computer. In both cases the tag recognition computer provides the QR codes and the corresponding x and y coordinates.
The QR codes are then mapped to the semantic primitives of the modelling language using an ontology. Hence, new physical figures with new QR codes require an ontology-based mapping to existing or new semantic primitives of the modelling language. Then the corresponding model that represents the scene on the table is generated and can be imported into the Scene2Model tool.
2. Installation of IoT Sensor via Virtual Environment
The virtual environment image uses oracle virtual box. Hence, the first step is to download and install the Oracle Virtual Box through the link below. To correctly use USB devices, such as the camera, download and install the VirtualBox Extension Pack through the link below.
Once the virtual machine has been installed, the Scene2Model images can be downloaded from this OMiLAB Link and this DigiTrans link, and imported. This „omitag_s2m.ova“ image has a size of 2GB and contains the tag recognition application within and the interaction with the USB camera. Run the Oracle Virtual Box and import the „omitag_s2m.ova“.
In addition to the above separate installation, a full packaged Tag recognition application virtual machine image can be downloaded that contains in addition to the tag recognition application also the Scene2Model toolkit and the corresponding connection. Downloading the corresponding 10 GB virtual machine image includes a full package version using a Fedora 29 installation. On this operating system the Scene2Model modelling tool and the OMiTAG sever for the tag recognition are installed. The Scene2Model modelling tool can be used right away, when the virtual machine is started.
The current OMiTAG server runs as a service and needs the camera Logitech HD Pro Webcam C920, as the current setup is configured for this camera type. Different cameras need to be calibrated; hence additional configuration effort is necessary.
3. Setup, Getting Started and Trouble Shooting
To test the installation, activate the different components in the following way:
- Plug-in the camera on USB and test if the camera is operating. Usually it shows a blue light at the camera, if in operation. In case the camera is not operating, use any windows application that requests the camera, to ensure that the camera is activated. Once it is activated, it can also be used via the virtual box.
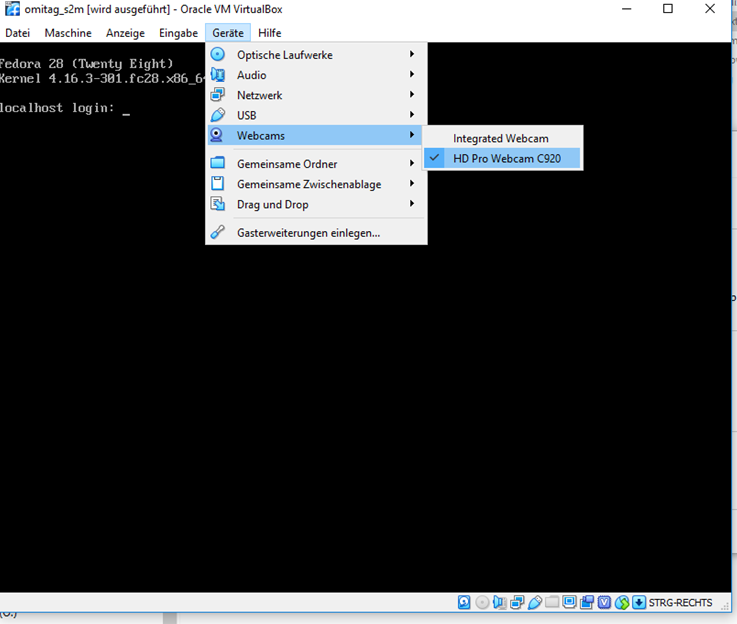
- Start Virtual Box and once the virtual box is running, start the omitag_s2m image.
- Select the correct camera using the device menu.
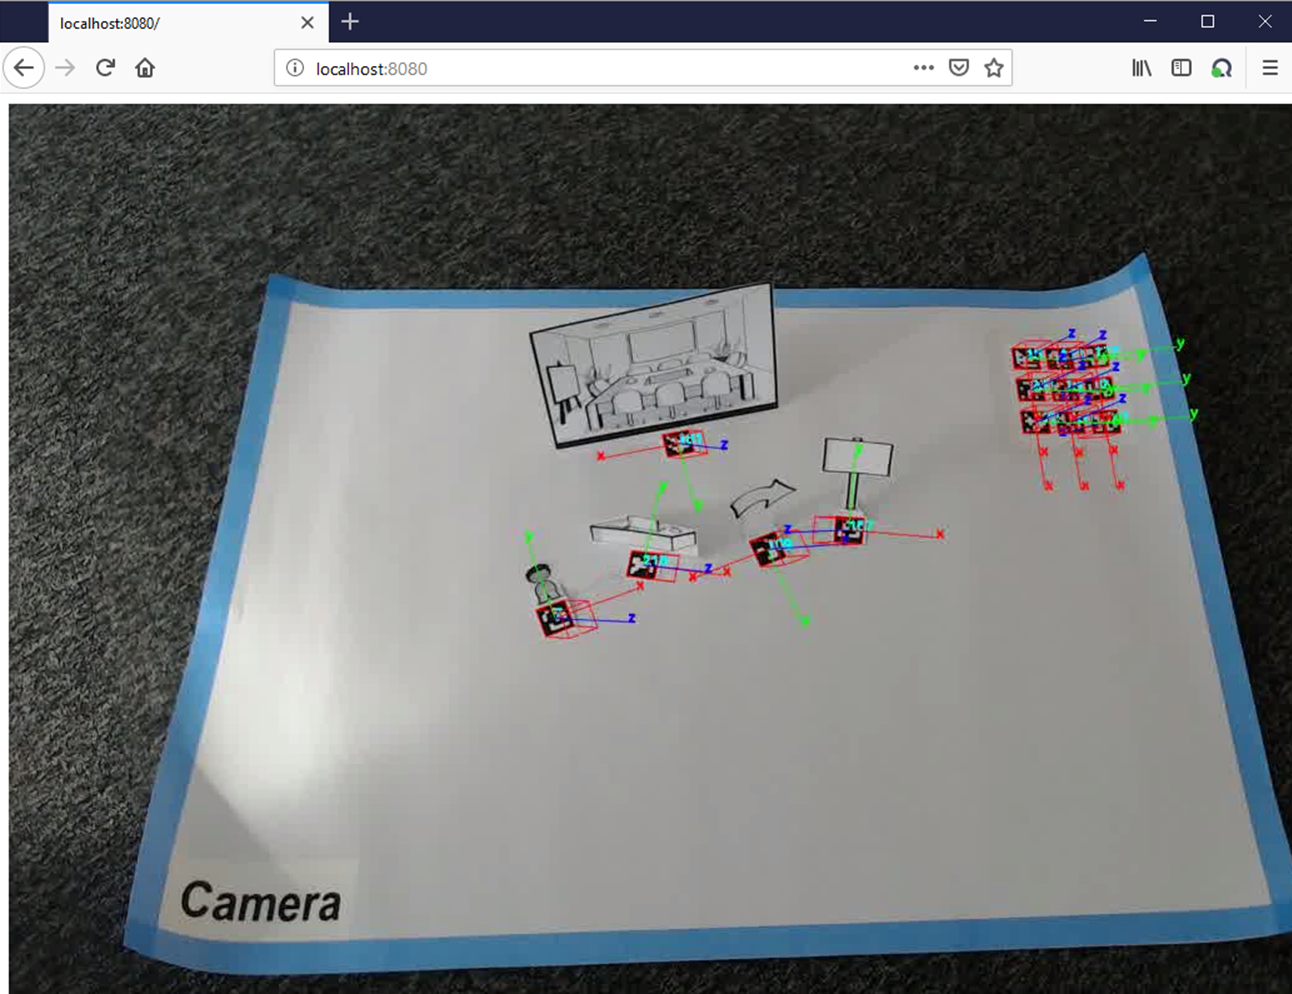
- To test the camera, go to http://localhost:8080, you should see the Scene2Model Canvas. It is important that the camera completely detects the nine QR codes in the corner, as they are used to calculate the position. The detection of a QR code can be verified, if there are three x, y and z arrows at the QR code.
Trouble shooting Check if the camera is correctly connected with the laptop, by using another programme that needs a camera. Ensure to close this programme, as only one programme can have access to the camera. Ensure that the Extension Package is installed. Restart the Virtual Box in case it behaves incorrect. Check if the camera is selected as “device”.